Sunday, June 23, 2013

Creating an Open Floor Plan

When we bought Shorebrook, I knew immediately that one wall in particular had to come down. I loved the general layout but this one wall just seemed totally out of place--separating the dining and living room into two totally different spaces instead of one open entertaining area.

Well Paul and our friend Shaun rummaged around in the attic--and after talking with Paul's cousin who's an engineer--they found that they could accommodate my request because the wall wasn't load bearing AND there was actually no ceiling joist tied to it. (Apparently the builder agreed with me on the open concept but was forced to put up a dummy wall between the rooms.)

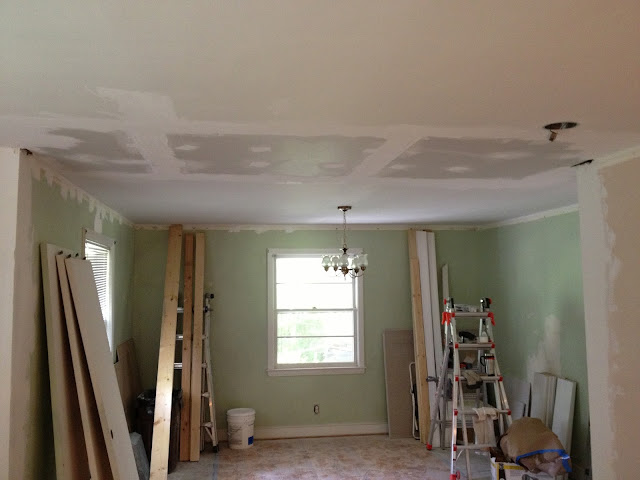
We're finally done with all of the re-drywalling, mudding, taping and clean up and ready for paint. Next step is to patch the hardwoods between the LR and DR and LR and entryway.

Here's what the process looked like:


Original flow between living room and dining room.
Wall comes down and a portion of the ceiling, too.

Clean up complete and preparation for patching begins.

The boys had to troubleshoot the two corners between the LR and DR in order to get the plaster flush and make a beautiful corner transition. Replaced existing stud with a 4x4 for extra strength and support.

The other opening looked so good, we decided to enlarge the entrance to the room from the hallway/entryway.


One of my favorite photos. You can really see it all coming together.

Enlarging the entryway opening and adding a 3/4 glass front door (pics to come) made a huge difference in opening up the feel of the front of the house.

Drywall patching complete, carpets come up! (see next couple of photos too)


Monday, May 27, 2013

Farewell Wallpaper...

One of the first things we knew had to go at Shorebrook was the plethora of wallpaper covering the dining room and both bathrooms. Faux paneling and big bold flowers, weren't exactly what we had in mind for our new space.

Thanks to help from my parents and my 86 year old grandmother, getting paper off the dining room and master bathroom was a breeze. I'm not big on chemicals, so we simply used a mixture of water and vinegar in a spray bottle + a couple of plastic scraping tools. We bought a scoring tool and used it briefly but found that it scared some of the plaster board walls, so we continued without it.


Total removal time for the dining room (12 x 15 ft) was probably 3 - 4 hours due to cleaning up the sticky pieces off the floor.  

**TIP: Pick up as much of the wet paper backing as possible as it comes off the wall before it starts to dry on the floor.**

Master bathroom paper pulled off without any work at all but the guest room bathroom took some extra elbow grease. Once all the paper was off, there were still some residual pieces of adhesive left on the walls. We're thinking about lightly sanding these down with a power sander but was wondering if anyone else had any better tips?  I've also heard a brillo pad could work. Leave a comment below if you have a great suggestion!

NEXT UP | Removal of the wall between the dining room and living room!


Monday, May 20, 2013

Welcome Home to Shorebrook Ave.

In April, Paul and I officially signed our lives away on a new little bungalow, thanks to Leslie Walker and the Wolfe Company. Owned by a single family since the 1950s, Shorebrook is filled with an array of treasures and memories that we hope to add to over time.

Nestled amidst an array of towering southern pines, lush camellia bushes and a sea of pink azaleas, this little bungalow is a bit more on the rustic side with unexpected clean lines and a hint of contemporary flare.

Much like Kirkland, Shorebrook Ave. needs a lot of love and a creative eye. However, this journey is kicking off with a couple of months of renovation to help ease the transition back into homeownership.

So put your design goggles on and see if you can picture where this rustic retreat is headed...

Upcoming Phase One Projects Include:
  • Recessed Lighting
  • Removal of the wall between the dining room and living room
  • Opening of the entry wall between the dining room and foyer
  • Paint, paint and more paint
  • Refinishing of the hardwoods and removal of the carpet
  • Tiling of den floor all the way through the kitchen
  • New french doors off the den
  • New 3/4 glass entry door


Living Room | Look for this wall to the dining room to be removed soon.
Dining Room | Watch for removal of the wall paper and new lighting.

Den | Watch for new tile on the floor, new doors and lighting.

Hall Bathroom | Pink Sink, Pink Toilet, Pink Tub...Phase 2

Hallway | Removal of carpet + paint + lighting.
Master Bed Room | Watch for paint and polish + new lighting. Lace curtains available...

Master Bath Room | Phase 2 ...Total gut job.

Guest Room | Paint and polish...
Guest Room 2 | Removal of the carpet + paint and polish.

Back Garden | Taming of the overgrown vegetable and flower garden...Phase 3

Back of the house | Watch for new patio doors and landscaping.

Monday, February 18, 2013

An Unexpected Journey

As many of you know, this fall we said goodbye to our little bungalow and started a new journey in South Carolina. It was easily the hardest decision we've ever made. In fact it's taken me nearly five months to work up the desire to write this post.

As we locked the door for the last time, we shed tears of sadness but also tears of pride. There was always a project that needed tweaking or a room that needed enhancing but we could never have made it through without the help of our family, friends and neighbors.

Thanks to everyone for feeding us when we were too hungry to put sentences together, tolerating us when the saws started running waaaayyy too early on a Saturday morning, thank you for taking our calls (Marsha) even when I was ranting about yet another unexpected "project" and for braving the reno with us every step of the way. But most of all thank you to my very loving and patient husband who never said no to even my wildest ideas. You are a true craftsman, who made our home a true jewel.

Bungalow Bliss is not only a testament to four years of building a home but a testament to a life filled with love, fellowship and adventure. As we look forward to starting a new home journey (one day soon), we wanted to honor our little bungalow one last time with a look back at the little house that could!

Much love y'all,
Laura


Saturday, May 19, 2012

VOTE! Front Door Makeover

Should we stay with the red or move on to something new? Here's a before and a proposed after. Weigh in by voting for your favorite option in the poll to the right of this post!


Wednesday, May 2, 2012

Coming Soon: Customizing storage solutions for a cottage

Here's a sneak peak of a post coming soon. For all you cottage dwellers, you know as well as I do that good storage space is hard to come by. Stay tuned for details on how we turned this unused awkward space into a window seat with ample storage.


Sunday, April 1, 2012

$75 Porch Makeover!

If you're like us, money can often be a little tight from the array of unexpected expenses that pop up with an old house. But with the house being appraised for a chance to refinance, we decided the porch needed a little sprucing up. Nothing like solid curb appeal to welcome the appraiser in!

After spraying the porch down and giving it a solid and much needed cleaning, here's what we did with just $75 and a little left over paint from the foundation project (note the columns).

Nothing like a few little pops of color to give the house a stylish update!

Shopping List:
2 Bags of Potting Soil: $6.46
2 Striped Outdoor Pillows: $13.98
Sunburst Door Mat: $18.97
Hosta (Quart): $2.50
Salvia May Night (5.5 L): $8.97
Europys (1G): $6.97
Paint (Already Had): $0
3 Pots (Already Had): $0
---------------------------
Total: $71.83