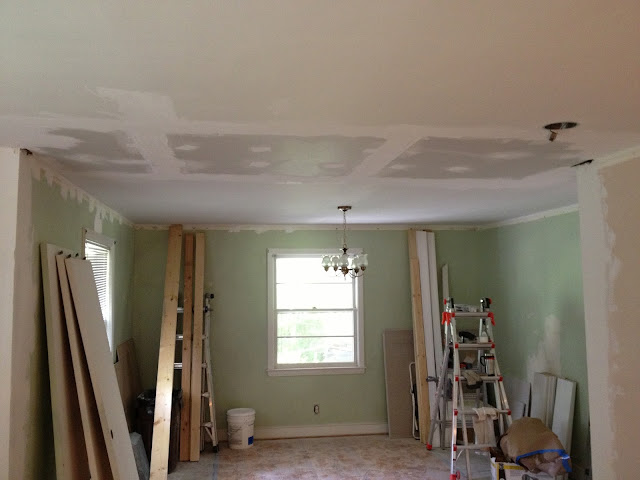
When we bought Shorebrook, I knew immediately that one wall in particular had to come down. I loved the general layout but this one wall just seemed totally out of place--separating the dining and living room into two totally different spaces instead of one open entertaining area.
Well Paul and our friend Shaun rummaged around in the attic--and after talking with Paul's cousin who's an engineer--they found that they could accommodate my request because the wall wasn't load bearing AND there was actually no ceiling joist tied to it. (Apparently the builder agreed with me on the open concept but was forced to put up a dummy wall between the rooms.)
We're finally done with all of the re-drywalling, mudding, taping and clean up and ready for paint. Next step is to patch the hardwoods between the LR and DR and LR and entryway.
Here's what the process looked like:
 |
| Original flow between living room and dining room. |
 |
| Wall comes down and a portion of the ceiling, too. |
 |
| Clean up complete and preparation for patching begins. |
 |
| The boys had to troubleshoot the two corners between the LR and DR in order to get the plaster flush and make a beautiful corner transition. Replaced existing stud with a 4x4 for extra strength and support. |
 |
| The other opening looked so good, we decided to enlarge the entrance to the room from the hallway/entryway. |
 |
| One of my favorite photos. You can really see it all coming together. |
 |
| Enlarging the entryway opening and adding a 3/4 glass front door (pics to come) made a huge difference in opening up the feel of the front of the house. |
 |
| Drywall patching complete, carpets come up! (see next couple of photos too) |


Thanks for sharing about how to create an open floor plan. Anticipating for additional like this. Also don't forget to see this What’s the deal with energy efficient vinyl windows? Are they really worth it?
ReplyDelete